Raw Material Selection
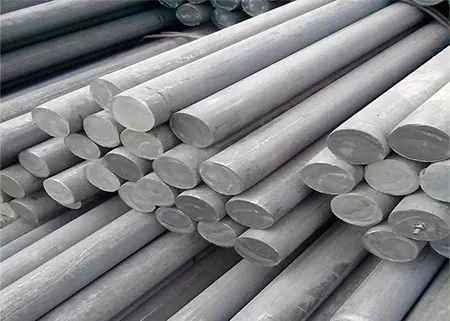
The production of stainless steel bars begins with the selection of raw materials. It is crucial to use good quality raw materials, which usually include alloys of iron, carbon, chromium, and other elements. Common stainless steels include AISI 304 and AISI 316, and choosing the right material depends on the use and requirements of the end product.
| Production Steps | Control Items | Equipment | Specific Operations |
| Raw Material Preparation | Ensure Raw Material Quality | Raw Material Analyzer | 1. Use a raw material analyzer to detect the chemical composition of raw materials.
2. Ensure that the raw materials selected are of high quality. |
Use a Raw Material Analyzer to Detect the Chemical Composition of Raw Materials
Collect raw material samples
- The sample is placed in a raw material analyzer, which can detect the content of various elements in the sample through spectral analysis and other methods.
- For each element, the instrument gives the corresponding content result, usually expressed as a percentage.
- Ensure that the chemical composition of each batch of raw materials meets requirements, such as chemical composition standards for different alloy grades or product requirements.
- Main alloying elements: carbon (C), chromium (Cr), nickel (Ni), manganese (Mn), molybdenum (Mo)
- Other possible elements: Silicon (Si), Sulfur (S), Phosphorus (P), Nitrogen (N), Copper (Cu), Titanium (Ti)
Ensure That the Raw Materials Selected are of High Quality
- Test results should match the chemical composition standards required for the product.
- Make sure the raw materials are free of obvious impurities or foreign matter.
- If necessary, confirm production and quality certification of raw materials with suppliers.
Mix Ingredients
The quality-tested raw materials are accurately weighed according to the formula and thoroughly mixed in the mixing equipment. Ensure that various elements are evenly distributed to ensure the consistency and performance stability of the final product.
| Production Steps | Control Items | Equipment | Specific Operations |
| Ingredients Mixed | Ingredients are Accurately Weighed and Mixed Evenly | Ingredient Weighing Equipment, Mixing Equipment | 1. Use accurate batching and weighing equipment.
2. Mix thoroughly in a mixing device to ensure an even distribution of various elements. |
Use Accurate Batching and Weighing Equipment
Ensure the accuracy and stability of ingredient weighing equipment.
- Determine the types and proportions of ingredients required.
- Turn on the ingredient weighing equipment and set the required ingredient types and corresponding weights.
- Add each ingredient one by one to the weighing device, making sure you add the exact amount each time.
- Wait for the weighing equipment to display the accurate weight value, and then move to the next ingredient after confirming it is correct.
- Repeat this operation until all ingredients are weighed.
Mix Thoroughly in the Mixing Equipment to Ensure Even Distribution of Various Elements
Ensure final product consistency and performance stability.
- Pour accurately weighed amounts of various ingredients into the mixing equipment.
- Start the mixing equipment and set the appropriate mixing time and speed according to product requirements.
- Ensure that the ingredients in the mixing equipment are thoroughly mixed, which can be determined by observing the appearance of the mixture and using a probe to detect the uniformity of the mix.
- If possible, gradually heat or lower the temperature during the mixing process to promote the mixing of the ingredients.
- After mixing is completed, the mixing equipment is stopped and the mixed ingredients are taken out and prepared for subsequent smelting or other processing steps.
Smelting
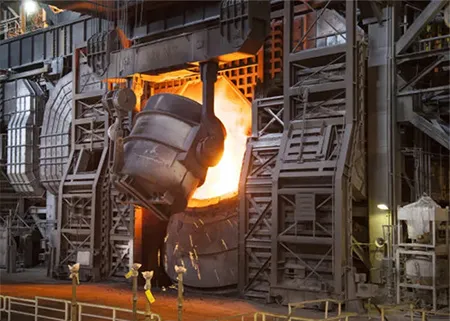
The raw materials after the ingredients are mixed are put into a high-temperature smelting furnace and heated to the alloying temperature. During the alloying process, by accurately controlling the melting temperature and time, adding appropriate flux to remove impurities, ensure that the alloy composition meets the design requirements.
| Production Steps | Control Items | Equipment | Specific Operations |
| Smelting | Alloy Composition Control, Impurity Removal | X-ray Fluorescence Spectrometer (XRF), Melting Furnace | 1. Use an X-ray fluorescence spectrometer (XRF) to monitor the alloy composition during the smelting process.
2. Control the melting temperature and time. 3. Add appropriate flux to remove impurities. |
Use an X-ray Fluorescence Spectrometer (XRF) to Monitor the Alloy Composition During the Smelting Process
X-ray fluorescence spectrometer (XRF) is a commonly used analytical instrument used to quickly and accurately determine the elemental content in materials.
- During the smelting process, samples are taken regularly.
- Place the sampled melt into an XRF instrument.
- XRF instruments determine the content of various elements in a sample by emitting X-rays and measuring the characteristic radiation excited by the sample.
- According to the analysis results provided by the XRF instrument, the melting conditions are adjusted promptly to ensure that the alloy composition meets the design requirements.
Control Melting Temperature and Time
Controlling melting temperature and time is an important step to ensure alloy composition and uniformity.
Melting Temperature Control
- Set the appropriate melting temperature based on the composition and melting point of the required alloy.
- Use the temperature control device of the melting furnace to keep the melting temperature stable.
- Monitor melting temperatures regularly to avoid temperatures that are too high, causing elements to evaporate, or too low, causing insufficient melting.
Melting Time Control
- Set the appropriate smelting time based on the type of alloy being smelted and the amount of smelting.
- Make sure the melting time is long enough so that the elements are thoroughly mixed and a uniform melt is achieved.
Add Appropriate Flux to Remove Impurities
Flux absorbs and removes impurities during the smelting process, helping to improve the purity and uniformity of the alloy.
- The appropriate flux is selected based on the characteristics of the melted alloy and the required purity.
- Flux is gradually added during the melting process.
- The flux absorbs impurities and forms slag or dross after melting, which can be easily removed later.
- Ensure that the amount and time of flux added are properly controlled to avoid too much or too little affecting the quality of the alloy.
Continuous Casting
The molten alloy is formed into a preliminary form of rod through continuous casting. During the continuous casting process, the cooling rate and crystallization direction need to be controlled to ensure the uniformity of the rod and the fineness of the grains.
| Production Steps | Control Items | Equipment | Specific Operations |
| Continuous Casting | Grain Structure Inspection, Speed Control | Metallographic Microscope, Continuous Casting Machine | 1. Use a metallographic microscope to check the grain structure and uniformity.
2. Control the continuous casting speed and crystallization direction to ensure product quality. |
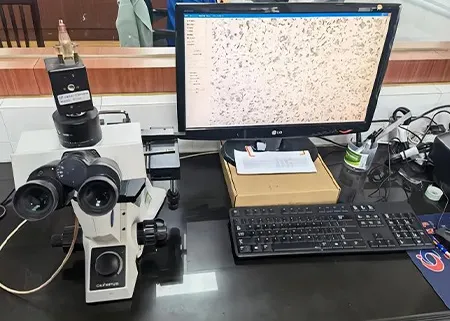
Use a Metallographic Microscope to Check the Grain Structure and Uniformity
Grain structure refers to the shape and arrangement of grains formed during continuous casting. A good grain structure should be small, uniform, and dense.
Steps
- Sampling the continuous casting billet, usually from the center of the continuous casting billet.
- The sampling samples are processed by metallographic sample preparation to prepare metallographic samples.
- Use a metallographic microscope to observe metallographic samples, focusing on the size, shape, and distribution of grains.
- A good grain structure should be small and uniform, which is beneficial to improving the mechanical properties and corrosion resistance of the product.
- Check the grains for defects, inclusions, and other undesirable factors.
Why Should it be Uniform
- Uniform grain structure helps improve the product’s strength, toughness, and wear resistance.
- Uniform grain structure can reduce uneven deformation and stress concentration, and improve product processability and stability.
- Control continuous casting speed and crystallization direction to ensure product quality:
Control of Continuous Casting Speed and Crystallization Direction is the Key to Ensuring the Quality of Continuous Casting Billets
Controlling Continuous Casting Speed
Adjust the pulling speed of the continuous casting machine according to product requirements and billet characteristics.
Steps:
- Set the appropriate pulling speed according to the diameter and length of the continuous casting billet.
- Control the stability of the pulling speed to avoid sudden changes or excessive fluctuations in speed.
- Adjust the pulling speed by monitoring the pulling force and deformation in the continuous casting process in real-time.
Controlling the Crystallization Direction
Adjust the temperature distribution of the crystallizer and use guiding devices to control the growth direction of the grains.
Steps:
- Adjust the cooling water temperature and flow rate in the crystallizer to control the cooling rate of the slab.
- Use the guide device to adjust the crystallization direction by changing the angle or position of the guide plate.
- Appropriate crystallization direction can affect the morphology and arrangement of crystal grains, which in turn affects the mechanical properties and surface quality of the product.
Rolling
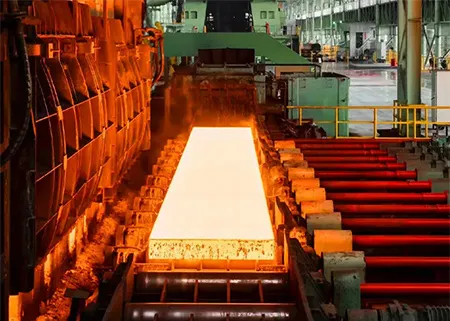
After continuous casting, the bars enter the rolling mill and undergo multiple rolling and stretching processes to gradually reduce the cross-sectional size and improve density and uniformity. The temperature and rolling intensity need to be strictly controlled during the rolling process to ensure the mechanical properties and surface quality of the bar.
| Production Steps | Control Items | Equipment | Specific Operations |
| Hot Rolled | Dimensional Measurement, Mechanical Property Testing | Ultrasonic Thickness Gauge, Tensile Testing Machine, Hot Rolling mill | 1. Use an ultrasonic thickness gauge to measure the thickness of the bar.
2. Use a tensile testing machine to measure the tensile strength of the bar. 3. Control the rolling temperature and rolling intensity. |
Use an Ultrasonic Thickness Gauge to Measure the Thickness of the Bar
Ultrasonic thickness gauge is a device used for non-contact measurement of material thickness. It is often used for online thickness measurement of steel on hot rolling production lines.
Operation Steps
Place the hot-rolled bar to be measured at the measurement position.
When the ultrasonic thickness gauge is started, its probe will emit ultrasonic waves to penetrate the steel and return signals.
The thickness of the steel is determined by measuring the time it takes for ultrasonic waves to travel.
To ensure measurement precision and accuracy, conduct multi-point measurements of bars in different parts to correct system errors.
Record and save the data of each measurement for subsequent analysis and adjustment.
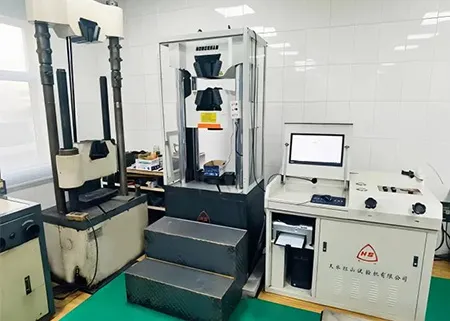
Use a Tensile Testing Machine to Measure the Tensile Strength of the Bar
Tensile testing machines are used to test the mechanical properties of materials under tensile force and are often used to measure the tensile strength, yield strength, etc. of bars.
Tensile Strength Index
Tensile Strength: The maximum tensile force a material can withstand in a tensile test, in MPa (MPa).
Yield Strength: The tensile force that a material endures when it begins to undergo plastic deformation. The unit is MPa (MPa).
Fracture Strength: The tensile force value when a material breaks in a tensile test, in MPa (MPa).
Elongation: The degree of tensile deformation of a material before tensile rupture, usually expressed as a percentage.
Operation Steps
Standard specimens were taken from hot rolled bars.
Secure the specimen in the clamps on the tensile testing machine.
Start the tensile testing machine and gradually apply tensile force to stretch the sample.
Measure the deformation of the sample under different tensile forces and record the stress-strain curve.
Tensile strength, yield strength, and other indicators are calculated based on the stress-strain curve.
Control Rolling Temperature and Rolling Intensity
Controlling the hot rolling temperature and rolling intensity are key factors affecting the size and mechanical properties of the bar.
Rolling Temperature Control
Determine the appropriate rolling temperature and set it according to different steel grades and product requirements.
Use the temperature control system of the hot rolling mill to ensure that the steel billet is rolled at the appropriate temperature.
For example, the temperature range can be between 800°C and 1200°C for different steel grades.
Rolling Intensity Control
Adjust the pressure of the roll to control the pressing force during the rolling process.
Determine the appropriate rolling intensity based on product requirements and steel properties.
For example, when producing high-strength steel, it may be necessary to increase rolling intensity to increase the density and strength of the material.
Cutting
The processed stainless steel rods are cut according to the length required by the customer to ensure that the product size meets the requirements.
| Production Steps | Control Items | Equipment | Specific Operations |
| Cutting | Length Detection | Length Measuring Instrument | 1. Use a length-measuring instrument to measure the length of the cut bar. |
Heat Treatment (Optional)
As needed, stainless steel rods may undergo heat treatment, such as tempering, quenching, etc., to adjust their hardness and strength.
| Production Steps | Control Items | Equipment | Specific Operations |
| Heat Treatment (Optional) | Hardness Control and Organizational Structure Observation | Metallographic Microscope, Hardness Tester, Heat Treatment Furnace | 1. Use a metallographic microscope to observe the organizational structure and grain size.
2. Use a hardness tester to measure the hardness and adjust the product’s hardness and strength. |
Use a Metallographic Microscope to Observe the Structure and Grain Size
A metallographic microscope is a microscope commonly used for observing metal structures and can display information such as the grain structure and phase composition of materials.
Steps:
Samples were taken from steel specimens before and after heat treatment.
Perform metallographic sample preparation on the sample, including cutting, grinding, etching, polishing, and other treatments to prepare metallographic samples.
Use a metallographic microscope to observe the organizational structure of the sample, focusing on the shape, distribution, and size of the grains.
Compare the structural differences before and after heat treatment to determine whether the effect of heat treatment meets the requirements.
By observing the fineness and uniformity of grains, the mechanical properties and corrosion resistance of the product are evaluated.
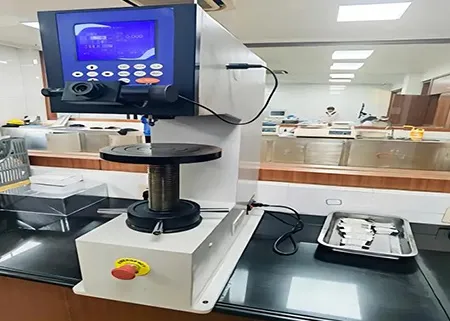
Use a Hardness Tester to Measure the Hardness and Adjust the Product Hardness and Strength
Hardness is the ability of a material to resist external forces and is often used to evaluate the hardness and strength of metallic materials.
Steps:
Samples were taken from steel specimens before and after heat treatment.
Place the sample on the hardness tester, apply a certain load, and measure the indentation size of the sample.
Based on the measurement results, the hardness value of the sample is calculated, usually represented by Rockwell hardness (HRC), Brinell hardness (HB), etc.
Compare the hardness values before and after heat treatment to determine the impact of heat treatment on product hardness and strength.
Adjust heat treatment parameters, such as temperature, holding time, etc., as needed to achieve the required hardness and strength requirements.
Stainless Steel Rod Peeling
Stainless steel rod peeling refers to the process of removing oxide scale or contaminants on the surface of stainless steel rods through mechanical processing or chemical treatment to improve its surface finish and overall aesthetics.
Steps
Preparation: Prepare the lathe, cutting tools and stainless steel rods to be processed, and ensure a clean and tidy working environment.
Clamp the stainless steel rod: Clamp the stainless steel rod with a diameter of 32 mm on the lathe and fix it to ensure stability.
Peeling processing: Use the tool on the lathe to process along the axial direction of the stainless steel rod to gradually remove the oxide scale on the surface. Adjust the feed rate of the lathe and the cutting parameters of the tool to gradually reduce the diameter to 30 mm.
Clean the surface: After completing the peeling, use detergent or cleaning tools to clean the surface of the stainless steel rod to remove any residue produced during processing.
Notes
Control the speed and depth of the peeling process to avoid excessive diameter reduction or shape deformation of the stainless steel rod caused by excessive peeling.
Ensure the sharpness of the tool and the appropriateness of the cutting parameters to avoid damage to the surface of the stainless steel rod and extend the service life of the tool.
During the peeling process, pay attention to keeping the working environment clean and tidy to avoid the impact of external impurities on the processing quality.
Testing Method
Visual inspection: Use the naked eye to observe the surface of the peeled stainless steel rod to check whether the oxide scale is completely removed and whether the surface finish meets the requirements.
Measure the diameter: Use a caliper or caliper to measure the diameter of the peeled stainless steel rod to confirm whether it reaches the predetermined 30 mm.
Testing standards:
Testing standards are usually determined according to the requirements of different industries and generally include regulations on the diameter, surface roughness, surface quality, etc. of the peeled stainless steel rod.
The diameter of the peeled stainless steel rod became 30 mm, and the surface roughness and quality met the predetermined requirements, indicating that the peeling process effectively removed the surface oxide scale and made the stainless steel rod meet the expected processing standards.
Quality Inspection
The final product needs to undergo various quality tests, including chemical composition analysis, mechanical property testing, appearance inspection, etc. These tests ensure that the chemical composition, mechanical properties, and surface quality of the product meet standards and customer requirements.
The above steps and raw material quality control ensure the accuracy and stability of the alloy composition during the production of stainless steel rods, thereby ensuring that the mechanical properties and chemical composition of the final product meet standards.
| Production Steps | Control Items | Equipment | Specific Operations |
| Quality Inspection | Chemical Composition Analysis, Mechanical Property Testing, Appearance Inspection | Chemical Analyzer, Tensile Testing Machine, Surface Detector | Use a chemical analyzer to detect chemical components.
Use a tensile testing machine to test mechanical properties. Use a surface tester to check its appearance. |
Use a Chemical Analyzer to Detect Chemical Components
Chemical composition is an important indicator for evaluating the quality of stainless steel bars and needs to comply with standards and customer requirements.
Steps:
Samples are taken from produced stainless steel rods, usually ingots or post-melt samples.
The sample is fed into a chemical analyzer, and different analysis methods (such as spectral analysis, atomic absorption spectrometry, etc.) are used according to different elements.
Measure the content of each element, such as carbon content, chromium content, nickel content, etc.
Compare analysis results with standards or customer requirements to ensure chemical composition meets requirements.
For example, the chemical composition of stainless steel should usually contain a specific chromium content (usually greater than 10%) to ensure corrosion resistance.
Use a Tensile Testing Machine to Test Mechanical Properties
Mechanical property testing is an important step in evaluating the mechanical properties such as strength and toughness of stainless steel rods.
Steps:
Take a sample of stainless steel bar, usually a sample after processing such as hot rolling.
Secure the specimen in the clamps on the tensile testing machine.
The tensile test is performed by gradually applying tensile force, and the test machine records the deformation of the sample under different tensile forces.
Measured data include tensile strength, yield strength, breaking strength, and elongation.
Compare the test results with standards to ensure that the mechanical properties of the product meet the requirements.
For example, the tensile strength of stainless steel rods should meet specific standards to ensure that they are not easily deformed or broken during use.
Use a Surface Detector to Check Appearance
Appearance inspection is an important step in evaluating the appearance quality of stainless steel bars, including surface finish, lack of defects, etc.
Steps:
Sampling from stainless steel rods produced, selecting samples from different locations and different batches.
Use a surface detector (such as an optical microscope, surface roughness measuring instrument, etc.) to check the quality of the sample surface.
Observe whether there are defects such as unevenness, oxides, cracks, pits, etc. on the surface.
Measure surface roughness to ensure compliance with standard requirements.
Check whether the appearance of the product meets the customer’s aesthetic requirements.
For example, the surface of stainless steel rods should be free of scratches, oxides, and unevenness, maintaining smoothness and beauty.

