Raw Material Preparation
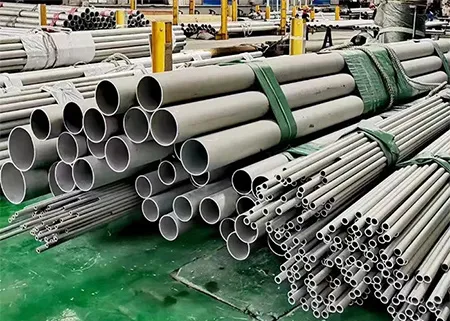
Commonly used raw materials include stainless steel blanks, usually round blanks.
Ensure That Raw Materials Meet Production Requirements and Raw Material Testing
Instrument: Chemical composition analysis instrument, such as ICP spectrometer.
Instructions:
- Sampling: Take random samples from stainless steel blanks to ensure that the samples are representative.
- Sample processing: Crush and mix the sample to ensure uniform distribution of chemical components.
- Analysis: Put the processed sample into an ICP spectrometer for analysis and determine the element content.
Note:
- Sampling should be representative to avoid interference from impurities.
Relevant standards: GB/T 4334, ASTM A262.
Size Detection
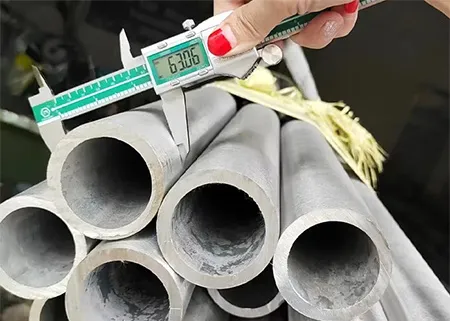
Instrument: tape measure, calipers.
Instructions:
- Prepare the instrument: Make sure the tape measure or caliper is marked and zero-point calibrated.
- Measure the diameter: Measure the diameter around the blank using a tape measure at three different locations on each end and in the middle.
- Measuring length: Use calipers to measure the length of the blank.
- Record data: record each measurement result and calculate the average.
Note:
- When measuring, make sure the tool is in close contact with the blank to avoid deviation.
- Measure multiple times and average to improve accuracy.
Relevant standards: GB/T 244, GB/T 908.
Blank Heating
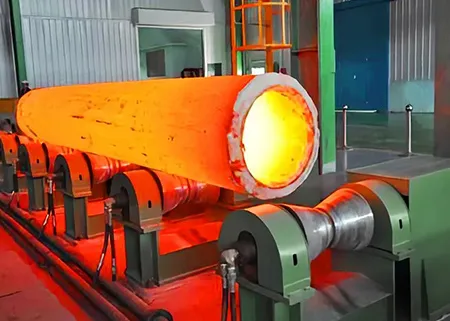
The blank needs to be heated, usually in a high-temperature furnace.
The purpose of heating is to soften the blank and make it easier to process in the next step.
Temperature Monitoring
Instrument: Thermal imaging camera.
Instructions:
- Prepare the instrument: turn on the thermal imager and adjust the parameters.
- Monitor the temperature: Aim the thermal imager at the surface of the blank and observe the temperature data on the display.
- Adjust heating: Adjust the temperature and time of the heating furnace according to the monitored temperature data.
Note:
- Make sure the thermal imager is kept at a certain distance from the surface of the blank.
- Observe the thermal imager screen to make sure the temperature is within the set range.
Relevant standards: GB/T 514, GB/T 9452.
Perforation
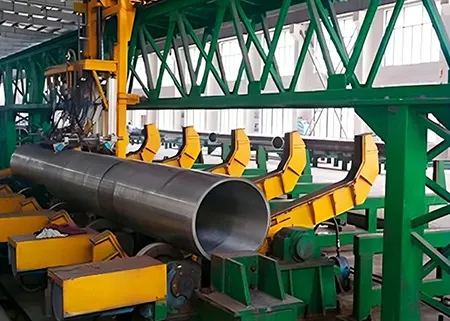
The heated blank is fed into the punching machine.
Perforation is the process of perforating the center part of the blank to form a tube shape.
Through rotation and thrust, the blank gradually forms a hollow tube shape.
Force Measurement
Instrument: Perforation force measuring instrument.
Instructions:
- Install the instrument: Install the piercing force measuring instrument on the piercing equipment.
- Debugging equipment: Adjust the thrust and rotation force of the perforation equipment.
- Monitor the force value: start the perforation equipment and monitor the changes in thrust and rotation force.
Note:
- Ensure uniform thrust and rotational forces and avoid uneven pipe wall thickness.
- Observe the force value displayed by the instrument and adjust the equipment parameters in time.
Relevant standards: GB/T 1184, GB/T 2975.
Size Detection
Instrument: inner diameter snap gauge.
Instructions:
- Prepare the instrument: Clean the snap gauge to ensure accurate measurements.
- Measuring the inner diameter: Insert the inner diameter caliper inside the tube blank and rotate it gently to measure the inner diameter.
Note:
- Ensure that the snap gauge is in good contact with the tube blank to avoid interference from impurities.
- Measure multiple times and take the average to improve measurement accuracy.
Relevant standards: GB/T 3093, ISO 10180.
Ultrasonic Flaw Detection
Instrument: Ultrasonic detector
Principle: Ultrasonic flaw detection is used to detect defects inside pipes, using the propagation characteristics of ultrasonic waves in materials.
Checkpoints:
- Check the pipe wall for cracks, pores, and other internal defects.
- Confirm that the pipe wall thickness is uniform.
Rolling Stage
Rolling
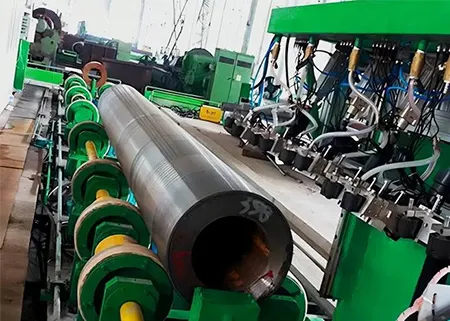
The perforated tube blank is sent to the rolling mill for rolling.
The rolling process includes cold rolling and hot rolling, and different rolling methods are selected according to different requirements.
Rolling is to adjust the thickness and outer diameter of the pipe wall so that it meets the specifications.
Force Measurement
Instrument: Rolling force measurement system.
How to use: Monitor and control pressure during rolling.
Note: Ensure uniform rolling force and adjust tube wall thickness.
Relevant standards: GB/T 13793, ASTM A370.
Size Detection
Instrument: Outside diameter snap gauge.
Usage: Measure the outer diameter of the tube blank.
Note: Keep the gauge clean to ensure accurate measurement.
Relevant standards: GB/T 3087, ASTM A530.
Metallographic Microscope Inspection
After cold drawing, the internal and external structure of the tube needs to be inspected with a metallographic microscope. The purpose is to detect whether there are cracks, pores, and other defects.
A metallographic microscope can help observe the grain structure of the pipe and ensure that the grains of the pipe are fine and uniform, thereby improving the strength and toughness of the material.
Pickling
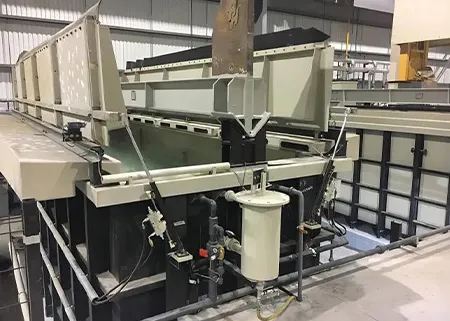
The rolled tube blanks need to be pickled. The purpose of pickling is to remove oxide scale and impurities on the surface of the tube blank, thereby improving the surface quality of the tube. Dilute sulfuric acid or other acidic solutions are generally used for pickling.
Pickling Process
Prepare the pickling tank: Place the rolled tube blank into the pickling tank and ensure that the tube blank is completely covered with liquid.
Pickling solution: Choose a suitable dilute sulfuric acid or other acidic solution as the pickling solution.
Pickling time: Determine the pickling time according to the thickness and surface quality requirements of the pipe.
Cleaning: After pickling, take out the pipe and rinse it with clean water to completely remove the remaining acidic solution.
Chemical Testing
Instrument: pickling liquid density meter, pH meter.
Instructions:
- Density detection: Use a pickling liquid density meter to measure the density of the pickling liquid.
- pH value detection: Use a pH meter to measure the acidity of the pickling solution.
Note:
- Density and acidity meet the requirements: Ensure that the density and acidity of the pickling solution are within the specified range to ensure the pickling effect and pipe surface quality.
- Safe operation: The pickling solution is corrosive and operators need to wear protective equipment.
Surface Quality Inspection
Instrument: metallographic microscope.
Instructions:
- Sample preparation: Take samples from the pickled pipes and prepare sample pieces for the metallographic microscope.
- Observation: Use a metallographic microscope to observe the cleanliness and metallographic structure of the pipe surface.
Note:
- High requirements for sample preparation: ensure that the sample pieces are not contaminated during preparation and keep the surface clean.
- Observation standards: According to relevant standards, observe whether the metallographic structure of the pipe surface meets the requirements.
Relevant standards: GB/T 2828, GB/T 6060.
During the pickling stage, the density and acidity of the pickling solution are monitored to ensure that the concentration and acidity of the pickling solution meet the requirements, thereby effectively removing the oxide scale and impurities on the surface of the tube blank and improving the surface quality of the pipe. At the same time, use a metallographic microscope to observe the surface of the pipe to ensure that its cleanliness and metallographic structure meet the requirements.
Cold Drawn
The pickled tube blanks enter the cold drawing machine for cold drawing.
Cold drawing uses drawing force to deform the tube blank in a cold state to improve its surface finish and dimensional accuracy.
Cold drawing can also improve the mechanical properties and density of the pipe.
Force Measurement
Instrument: cold-drawn tensile gauge.
How to use: Monitor the tensile force during cold drawing.
Note: Ensure uniform cold drawing and improve the mechanical properties of the pipe.
Relevant standards: GB/T 14981, ASTM A106.
Size Inspection
Instrument: Outside diameter snap gauge.
Instructions for use: Measure the outer diameter of the pipe after cold drawing.
Note: Keep the calipers accurate to avoid damaging the pipe surface.
Relevant standards: GB/T 8713, ASTM A519.
Annealing Stage
Cold-drawn pipes need to be annealed. Annealing is a process in which the pipe is heated to a certain temperature, kept warm for a while, and then slowly cooled. Annealing can eliminate the stress generated during cold drawing and improve the structure and performance of the pipe.
Temperature Monitoring
Instrument: Annealing furnace temperature control instrument.
Instructions:
- Set temperature: Set the temperature of the annealing furnace according to the pipe material and annealing requirements.
- Monitor the temperature curve: start the annealing furnace, and monitor and control the temperature curve during the annealing process.
Note:
- Precise temperature control: ensure that the temperature of the annealing furnace is stable within the set value range.
- Keep the heat preservation time: According to the requirements, keep the pipe warm at the set temperature for a certain time.
Relevant standards: GB/T 13298, ASTM A213.
Hardness Test
Instrument: Vickers hardness tester.
Instructions:
- Prepare pipe samples: Prepare coupons from the annealed pipe.
- Measuring hardness: Use a Vickers hardness tester to conduct a hardness test on the sample piece according to the operating requirements.
Note:
- Avoid damage to the test head: Ensure that the test head of the hardness test is in good contact with the surface of the pipe, but does not damage the surface.
- Averaging multiple measurements: Perform multiple hardness tests and average them to improve measurement accuracy.
Relevant standards: GB/T 231.1, ASTM E18.
Metallographic Microscope Examination
The annealed stainless steel pipe needs to be inspected with a metallographic microscope to observe the grain structure and organization of the pipe.
Ensure that the grains of the pipe are uniform and fine, which helps to improve the strength and toughness of the material.
Trim
Annealed pipes need to be trimmed, including cutting, trimming, drilling, and other processes, so that the size, shape, straightness, and flatness of the pipes meet the requirements.
Use of Dimensional Measuring Instruments
Instrument: tape measure, calipers, and other dimensional measuring tools.
Instructions : Measure the outer diameter of the pipe after cold drawing.
Note:
- Keep measuring tools clean: Remove impurities on the surface of dimensional measuring tools to avoid affecting measurement accuracy.
- Average multiple measurements: Take multiple measurements and average them to improve the accuracy of your dimensional measurements.
Relevant standards: GB/T 244, GB/T 908, GB/T 3093, ISO 10180, etc.
Pipe Straightness and Flatness Inspection
Instrument: Instrument for measuring straightness and flatness, such as straightness rulers, flatness meters, etc.
Instructions:
- Prepare instruments: Select appropriate measuring instruments and determine the test plan according to the requirements of the pipe material.
- Measuring straightness: place the straightness ruler along the length of the pipe and observe the degree of bending of the pipe.
- Measuring flatness: Use a flatness meter or similar instrument to detect the degree of unevenness on the surface of the pipe.
Note:
- Accurate operation: Make sure the instrument is placed and used correctly to accurately read straightness and flatness.
- Multi-point inspection: Conduct multi-point inspection on different positions of the pipe to comprehensively consider the overall straightness and flatness.
Relevant standards: GB/T 14981, GB/T 3190, ISO 9001, etc.
Surface Treatment (optional)
Depending on the end application requirements, the pipe may require further surface treatment such as polishing, sandblasting, etc. to achieve a specific surface finish or texture.
Cleaning
Before any surface treatment is carried out, stainless steel pipes first need to be thoroughly cleaned to remove oil, dust, and other impurities from the surface. Use appropriate cleaning agents and equipment, such as alkaline cleaning solutions or organic solvents, to ensure that the pipe surface is clean.
When cleaning, be careful to avoid using cleaning agents containing chloride ions, because chloride ions can easily cause pitting corrosion of stainless steel.
Inspection equipment: Surface cleanliness testing instrument
Step:
- Prepare the instrument: Choose a cleanliness testing instrument suitable for stainless steel pipes.
- Measurement: Place the pipe in the testing instrument for cleanliness testing.
- Reading results: According to the instructions of the instrument, read the cleanliness data of the pipe surface.
Polishing
Polishing is one of the common surface treatment methods for stainless steel pipes, which can improve its surface finish and flatness. Stainless steel pipes are polished using polishing machinery and abrasives.
Different polishing degrees can be achieved by selecting different abrasive grain sizes and polishing machinery. Common polish levels include mirror polish, matte polish, and matte polish.
Inspection equipment: brightness instrument
Step:
- Prepare the instrument: Choose a brightness detection instrument suitable for stainless steel pipes.
- Measurement: Place the pipe in the testing instrument for brightness detection.
- Reading results: According to the instructions of the instrument, read the brightness data of the pipe surface.
Pickling
Pickling can remove the oxide scale on the surface of stainless steel and the heat treatment oxide scale produced by welding, and improve the corrosion resistance of stainless steel. The pickling process has been mentioned in detail before, and attention needs to be paid to controlling the concentration, temperature, and time of the pickling solution.
Sufficient cleaning is required after pickling to ensure that the pickling liquid is completely rinsed away.
Inspection equipment: chemical testing instruments
Step:
- Prepare the instrument: Choose a chemical composition analysis instrument suitable for stainless steel pipes.
- Sampling: Take samples from the cleaned pipes.
- Analysis: Put the sample into the instrument for chemical composition analysis.
- Interpret the results: Determine whether the pipe surface is clean based on the analysis results.
Sandblasting
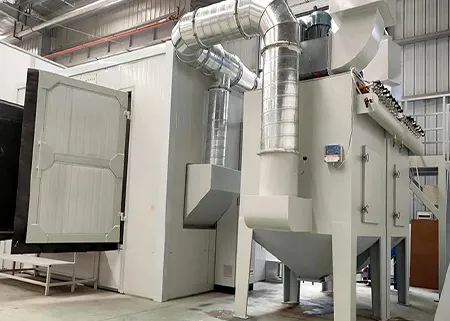
Sandblasting is a surface roughness treatment method that impacts the surface of stainless steel pipes by spraying sand or other abrasive particles at high speed to remove scale and stains and improve their surface quality.
Control blast pressure, blast particle size, and blast time to achieve desired surface roughness and cleanliness.
Inspection equipment: surface roughness instrument
Step:
- Prepare the instrument: Choose a surface roughness testing instrument suitable for stainless steel pipes.
- Measurement: Place the pipe in the testing instrument for surface roughness testing.
- Reading results: According to the instructions of the instrument, read the roughness data of the pipe surface.
Spraying or Coating
In some specific applications, stainless steel pipe may need to be sprayed or coated. For example, anti-corrosion coatings or aesthetically pleasing color coatings.
During the coating process, attention should be paid to selecting coating materials suitable for stainless steel and ensuring uniform coating and firm adhesion.
Anti-rust Treatment
After surface treatment of stainless steel pipes, anti-rust treatment can be carried out, such as coating with a thin layer of anti-rust oil film or anti-rust paste to prevent rust during transportation and storage.
Inspection equipment: visual inspection, adhesion testing equipment
Step:
- Visual inspection: Check whether the coating is uniform and whether there are defects or poor coating.
- Adhesion test: Use an adhesion testing instrument to conduct an adhesion test on the coating to ensure that the coating is firmly bonded to the pipe surface.
Brightness and Cleanliness Inspection
After the surface treatment is completed, the brightness and cleanliness need to be checked. Ensure that the surface brightness and cleanliness of the stainless steel pipe meet the requirements.
Inspection Phase
After production is completed, stainless steel seamless pipes need to undergo strict quality inspection, including testing of outer diameter, wall thickness, length, chemical composition, mechanical properties, etc.
Outer Diameter and Wall Thickness Measuring Instruments
Inspection equipment: outer diameter measuring instrument, wall thickness measuring instrument
Step:
- Use an outside diameter measuring instrument to measure the outside diameter of the tube.
- Use a wall thickness measuring instrument to measure the wall thickness of the pipe. Ensure that the outer diameter and wall thickness meet standard requirements.
Chemical Composition Analyzer
Inspection equipment: chemical composition analyzer
Step:
- Test the chemical composition of the tube again using a chemical composition analyzer. Ensure chemical composition meets standard requirements.
Mechanical Property Test (Tensile Test)
Inspection equipment: Tensile testing machine
Principle: Detect the tensile strength, yield strength, and other mechanical properties of the pipe.
Checkpoints: Confirm whether the tensile strength and yield strength of the pipe meet the standard requirements.
Eddy Current Flaw Detector
Inspection equipment: Eddy current flaw detector
Principle: The principle of eddy current induction is used to detect defects such as cracks and holes on the surface of the pipe and inside the pipe wall.
Inspection points: Check whether there are cracks, holes, and other defects on the surface of the pipe and inside the pipe wall.
Hydrostatic Test
Inspection equipment: hydraulic test equipment
Principle: Conduct a water pressure test on the pipe to detect its sealing and pressure resistance.
Checkpoints: Make sure the pipe does not leak or burst under the specified pressure.
Hardness Measurement
Inspection equipment: hardness measuring instrument (such as Rockwell hardness tester)
Principle: Used to detect the hardness of pipes.
Checkpoints: Confirm whether the hardness of the pipe meets the specified range.
Chemical Solution Detection (After Pickling)
Inspection equipment: chemical solution testing equipment
Principle: Used to detect whether the surface of the pipe is clean after pickling.
Checkpoints: Confirm whether there are oxides, rust spots, and other impurities on the surface of the pipe.

