Table of Contents
Introduction
Steel testing shows how strong it is. This blog will teach ways to test mild steel strength. Tensile tests, compression tests, and hardness tests are important. It helps know how much load steel can take. Mild Steel Strength is key for many uses.
What Are the Key Methods to Measure Mild Steel Strength?
There are many ways to see how strong mild steel is. Let’s learn together!
Tensile Testing
Tensile testing stretches steel until it snaps. Engineers use a specimen which is 10mm wide and 50mm long. This test determines the Ultimate Tensile Strength at 400 MPa. ASTM E8 outlines the steps. Mild Steel Strength deals with how much load the material can take before failure.
Compression Testing
Compression testing compresses the steel. The sample size is 20 mm diameter and 30 mm height. This test measures CS which is equal to 250 MPa. ASTM E9 describes the rules. They quantify the extent of its compression. Intensely fused steel does not corrode easily.
Impact Testing
Impact testing involves using a pendulum to strike steel. Charpy V-notch test determines the amount of energy required. This test requires a 2 mm notch. The impact energy recorded is 200 J. The procedures are in line with ASTM E23. This toughness demonstrates the ability of the material to withstand impacts.
Hardness Testing
Hardness testing bends a diamond into steel. Resistance to indentation by engineers is usually measured. Rockwell Hardness Scale (HRB) exhibits values up to 95 HRB. The applied load is 100 kg. ASTM E18 provides instructions. Hard steel is not easily worn out or decomposed.
Flexural Testing
Flexural testing subjects the steel to bending until it reaches its breaking point. They work with specimens that are 10 mm in thickness and 40 mm in width. The FS recorded for FS is 150 MPa. ASTM D790 outlines the process. They use a bending fixture.
Fatigue Testing
Fatigue testing involves repeated loading of steel. Engineers find out how many cycles it can take before it breaks. This test provides fatigue strength at 1 cycle of 10^6, which is 150 MPa. ASTM E466 provides guidelines. The specimen is 12 mm in diameter.
| Method | Purpose | Units | Equipment | Specimen Shape | Standard |
| Tensile Testing | Measure tensile strength | MPa (megapascals) | Universal testing machine | Dog-bone | ASTM E8 |
| Compression Testing | Measure compressive strength | MPa (megapascals) | Compression tester | Cylindrical/Cubic | ASTM E9 |
| Impact Testing | Assess impact resistance | J (joules) | Charpy impact tester | Notched bar | ASTM E23 |
| Hardness Testing | Evaluate hardness | HRB/HRC (Rockwell) | Rockwell hardness tester | Flat surface | ASTM E18 |
| Flexural Testing | Determine flexural strength | MPa (megapascals) | Flexural testing machine | Rectangular beam | ASTM D790 |
| Fatigue Testing | Analyze fatigue life | Cycles | Fatigue tester | Variable | ASTM E466 |
Table on the Key Methods to Measure Mild Steel Strength!
How Is Tensile Testing Conducted for Mild Steel?
We will see how to test steel by stretching it. Follow along to learn more!
Test Specimen
Engineers prepare a test specimen. The rod is of width 10mm and length 50mm. This follows ASTM E8. Gauge length is marked. Calipers are used by engineers for precision. Mild Steel Strength is tested. The steel piece is ready.
Universal Testing Machine
The Universal Testing Machine (UTM) is used to apply force. It is equipped with a load cell of 100 kN. Engineers place the steel specimen into the UTM. This machine records load and extension. The test verifies tensile characteristics. Mild Steel Strength is assessed here.
Gripping Methods
Engineers use wedge grips. These apply 2000 N pressure. These grips provide assurance of no slippage during the test. Proper alignment is key. Engineers adjust grips carefully. This setup is vital.
Loading Rate
Loading rate refers to the rate at which force is applied. Civil engineers use a rate of 5 mm/min. ASTM E8 provides guidelines. Consistent rates are essential. Engineers control this precisely. Mild Steel Strength requires accurate loading. The rate aids in the comparison of tests.
Elongation Measurement
Elongation is the extent to which the steel is stretched. Engineers use an extensometer. It attaches to the specimen. This can be up to 20% elongation. The gauge length is 50 mm and the method is guided by ASTM E8. Engineers track the stretch. Elongation shows ductility.
Stress-Strain Curve
Stress-strain curve depicts how steel behaves. The tensile stress (MPa) is plotted against the tensile strain (%). Yield strength, Ultimate Tensile Strength, and elongation are identified by engineers. Engineers study these curves. Mild Steel Strength is well understood here.
What Is the Procedure for Compression Testing in Mild Steel?
Let’s find out how squishing steel shows its strength. Come and explore with me!
Sample Preparation
Wash the small metal part. It should be 10 mm wide and 20 mm tall. Thickness can best be measured using a micrometer and cutting done using a saw. A grinder smooths edges. For examination, use a magnifying glass.
Compression Platens
The sample is held by two flat metal ss plates known as platens. Put them on the testing machine. The upper platen travels; the lower one remains stationary. Ensure that the platens are parallel to one another. Misalignment causes errors.
Load Application
Put load with the machine. It pushes down at the rate of 2 mm per minute. A load cell quantifies the force. Maximum load which can be applied is 100 kN. Watch the digital display. This is how Mild Steel Strength gets tested.
Deformation Measurement
Use an LVDT sensor to measure changes in shape. This sensor monitors sample shortening. Data is taken every 0.1 mm. The graph plots changes. Accurate measurement is key.
Stress Calculation
Stress means force over area. Determine stress by using the formula σ = F/A. Here, F stands for force and A for area. Use a calculator. Stress value assists in comprehending strength. Higher stress indicates better material.
Result Analysis
The computer displays the results. Analyze the stress-strain curve. Determine the yield point and the ultimate strength. Yield point is where it begins to change its shape. Ultimate strength is the maximum load that a material can endure before it fails. Compare with standards.
How Does Impact Testing Work for Mild Steel?
We’ll see how hitting steel with a hammer tells us about its strength. Exciting, right?
Charpy Test
A pendulum strikes the sample. It’s 10 mm square. This measures impact strength. Read absorbed energy in joule (J). Higher energy results into stronger metal. Charpy tests are fast. The machine does it fast. It helps find Mild Steel Strength.
Izod Test
This test erects the sample. It is hit by a hammer at the top. Absorbed energy is measured. Izod tests employ 5 mm thick samples. It is different from Charpy tests. Results show toughness. Metal with high density takes more energy. Reliable tests are necessary.
Notch Preparation
Create a hole on the sample. It is 2 mm deep and in the form of a V. Use a notching machine. This weakens the sample. Hammer strikes the notch. Notches simulate real flaws. Proper prep is key. Comprehensive testing requires good notches.
Swing Hammer
A hammer moves to strike the sample. It weighs 10 kg. Swings at 5 m/s. Energy is transferred to the sample. It breaks. Measure the energy absorbed. Swing hammers must function properly. Malfunctions mess up results. This way of testing Mild Steel Strength demonstrates the idea of toughness.
Fracture Energy
Fracture energy disintegrates the sample. Measured in joules (J), it shows metal toughness. High energy is synonymous to strong metal. Record this data. Compare with standards. Fracture energy is crucial. Choosing materials requires this information.
Test Temperature
Temperature affects testing. Performed at 20°C to maintain uniformity, temperature changes metal behavior. One must use a thermometer to determine. Keep the room stable. Cold tests may differ. Control temperature for accuracy. Results depend on it.
What Are the Criteria for Sample Preparation in Steel Testing?
Preparing the steel piece right is important. Let’s see how we do it.
Dimensions
The sample is 10 cm in length, 5 cm in breadth, and 0.5 cm in thickness. Dimensions require the use of calipers so that measurements can be precise. ASTM E8 standards help. Mild Steel Strength tests require accurate sizes. They ensure correct results.
Surface Finish
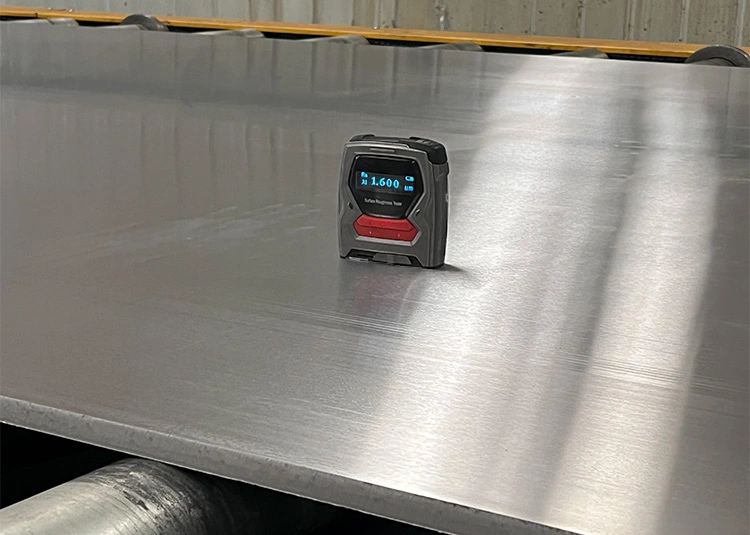
The surface of the silicon must be smooth. Ra value is 1.6 µm. This reduces friction. Grinders make surfaces smooth. Roughness can change data. Mild Steel Strength depends on good finish. They check surface quality.
Notch Geometry
The notch is 2 mm deep and has a 0.5 mm width. This changes stress points. Geometry must be exact. Tools cut precise notches. Testing needs consistent notches. Stress concentrates here. Mild Steel Strength tests employ these notches.
Alignment
Alignment keeps samples straight. It prevents errors. Use an alignment jig. Samples must be parallel. Testing needs correct alignment. Misalignment can change results. A mild Steel Strength test requires proper alignment.
Marking
Marking identifies samples. Use laser engravers. A mark is assigned to each sample. Numbers like ID1001 are used. Testing needs clear marks. Marks stay on samples. They help track data. Mild Steel Strength samples have identification marks.
Pre-Treatment
Pre-treatment includes heating. Temperature is 200°C. This removes stress. Samples cool after. Quenching follows heating. Mild Steel Strength relies on this. This step changes microstructure. It makes samples uniform. They also regulate temperate and time.
How to Interpret Results from Mild Steel Strength Tests?
Understanding the test results is key. Let’s learn what they mean together!
Yield Strength
Yield strength indicates stress limit. It measures in MPa. 250 MPa is common. Testing reveals this point. Yield strength is useful in designing for safety. Stress-strain curves find this. This parameter is key. Engineers rely on it. They require specific yield strength information.
Ultimate Strength
Ultimate strength is the maximum load it can take as a material or structure. 450 MPa is typical. This measures material capacity. Mild Steel Strength reveals at this point. Engineers use this data. It guides safety limits. Tests show maximum load.
Fracture Point
Fracture point demonstrates the breaking stress. It measures in MPa. 200 MPa is common. Testing finds this point. Engineers use fracture data. Safety designs need it. Mild Steel Strength is broken here. Fracture point is vital. It ensures safety.
Elastic Modulus
Elastic modulus shows stiffness. It measures in GPa. 210 GPa is typical. Testing finds resistance. Engineers use this data. It helps design materials. Stress-strain slopes calculate it. Elastic modulus ensures performance. Mild Steel Strength depends on it. Engineers need accurate values.
Ductility
Ductility refers to the extent of stretch before a material breaks. It measures in %. 20% is typical. Testing finds ductility. Engineers use this data. Forming processes need it. It helps flexibility. Mild Steel Strength requires ductility.
Toughness
Toughness shows energy absorption. It measures in Joules. 50 J is common. Testing reveals toughness. Engineers use this data. It assists in shock absorption. Mild Steel Strength requires it to be tough. It enables that material can withstand shocks.
What Are Common Challenges in Mild Steel Strength Testing?
Testing steel can be tricky. Let’s see the problems and how we fix them.
Sample Alignment
Machines require components to be a perfect match. If not, the numbers can be wrong. Angles should be 90°. Misalignment can alter the force by 12%. Proper clamps and holders are useful. Angle sensors check alignment. This is vital for accurate outcomes.
Machine Calibration
This is why the machines must be checked every month. Wrong settings change data. A variation of 5% is possible. There is a need to calibrate load cells and gauges. Weights help adjust them. Calibration keeps numbers right. Machines provide good data in this way.
Data Accuracy
Mild Steel Strength, setup has to be perfect. Proper calibration is vital. Employ 32-bit processors for accurate measurements. It can be ±0.02 MPa for errors. DAQs collect info. Accurate strain checks matter. It gives true results.
Temperature Control
Temperature must be steady. Keep it 25°C ±1°C. Thermostats and heaters help. Larger changes lead to ±0.5% errors. Chambers keep it stable. Thermocouples measure heat. Temperature control means good results.
Material Consistency
Materials must be equal. Differences cause test issues. Carbon content of 0.2% influences the strength. Spectrometers check the mix. Same samples mean right data. Regularity guarantees that Mild Steel Strength tests are effective.
Operator Error
Skilled workers are needed. Mistakes change results. Corporate training reduces errors by 15%. SOPs guide steps. Supervisors watch the work. This ensures good results.
How to Ensure Accurate Testing Conditions for Mild Steel?
Let’s make sure our tests are just right. Follow these steps to get perfect results!
Yield Strength
Yield strength indicates stress limit. It measures in MPa. 250 MPa is common. Testing reveals this point. It’s vital for engineers. Yield strength is useful in designing for safety. Stress-strain curves find this. This parameter is key. Engineers rely on it. They require specific yield strength information.
Ultimate Strength
Ultimate strength is the maximum load it can take as a material or structure. 450 MPa is typical. This measures material capacity. Mild Steel Strength reveals at this point. Engineers use this data. It guides safety limits. The maximum stress is the measure of the maximal load that a component can withstand. This step is crucial. Engineers rely on it. Tests show maximum load.
Fracture Point
Fracture point demonstrates the breaking stress. It measures in MPa. 200 MPa is common. This limit is key. Testing finds this point. Engineers use fracture data. Safety designs need it. Mild Steel Strength is broken here. They need this data. Fracture point is vital. It ensures safety.
Elastic Modulus
Elastic modulus shows stiffness. It measures in GPa. 210 GPa is typical. Testing finds resistance. Engineers use this data. It helps design materials. Stress-strain slopes calculate it. Elastic modulus ensures performance. Mild Steel Strength depends on it. Engineers need accurate values.
Ductility
Ductility refers to the extent of stretch before a material breaks. It measures in %. 20% is typical. This is important. Testing finds ductility. Engineers use this data. Forming processes need it. It helps flexibility. They check this carefully. Mild Steel Strength requires ductility. This step is crucial for materials.
Toughness
Toughness shows energy absorption. It measures in Joules. 50 J is common. Testing reveals toughness. Engineers use this data. It assists in shock absorption. Mild Steel Strength requires it to be tough. It enables that material can withstand shocks. This data is of paramount importance for safety.
What Are the Standards and Regulations for Steel Strength Testing?
There are rules for testing steel. Let’s learn about them together!
ASTM Standards
ASTM uses ASTM A36. Yield strength is 250 MPa. Elongation must be 20%. Tensile strength is in the range of 400-550 MPa. They use UTM machines. Area reduction is checked. Impact tests check ductility. ASTM standards are strict.
ISO Standards
ISO 6892-1 is centered on steel. Tensile strength is 410 MPa. Yield stress is 280 MPa. “Dog-bone” specimens are used. Test speed is 5mm/min. Elongation must be 22%. ISO standards are international for mild steel strength.
EN Standards
EN 10025-2 tests steel. The yield strength is 275MPa. Tensile strength can be increased up to 430 MPa. Charpy tests at -20°C. Elongation must be 23%. Specimens are 100 mm in length. EN standards are European for mild steel strength.
JIS Standards
JIS G3101 sets rules. Yield strength is 235MPa. Tensile strength is 400 MPa. Test speed is 1 mm/s. Elongation is 25%. Impact tests use notch of 2 mm thickness. JIS standards are Japanese.
Compliance Requirements
Compliance needs a curve. Modulus of elasticity is 210 GPa. Elongation is 25%. They check fracture toughness. HRB scale is for hardness. Adherence to standards promotes safety and quality.
Certification Processes
Certification tests steel. Yield strength is 275 MPa. Ultrasonic tests for flaws. Elongation must be 20%. Samples are 100 mm long. Tensile strength is 430 MPa. Certification ensures reliability.
Conclusion
Testing methods show steel’s strength. Tensile, compression, and hardness tests are important. Mild Steel Strength is tested many ways. Visit ALLOYXPERT for more on steel tests. This helps make strong steel parts. Find more tips at AlloyXpert.
Read More:
Which Mild Carbon Steel Grades Are Best For Manufacturing?


